Neckline reinforcement
| Introduction: This article is an excerpt of the Sammen tunic pattern. Unlike the typical i-cord reinforcement, this technique is completely invisible. It can be applied to any cardigans or pullovers with a wide neckline. The neckline has to be wide since the reinforcement is only minimally stretchy. If you apply it to an already tight neckline you might not be able to pull your sweater over your head. The good thing about this reinforcement is that it is done after your garment is completely finished. You can try the sweater on and even wear it a few times before deciding whether you need this reinforcement. |
If you find that the neckline of your garment is stretching more than it should, you can use a technique called underpinning to control the stretch. Depending on your size and your yarn, you may or may not need this reinforcement at all. The bigger the size and the heavier the yarn, the more the sweater is likely to stretch because of gravity.
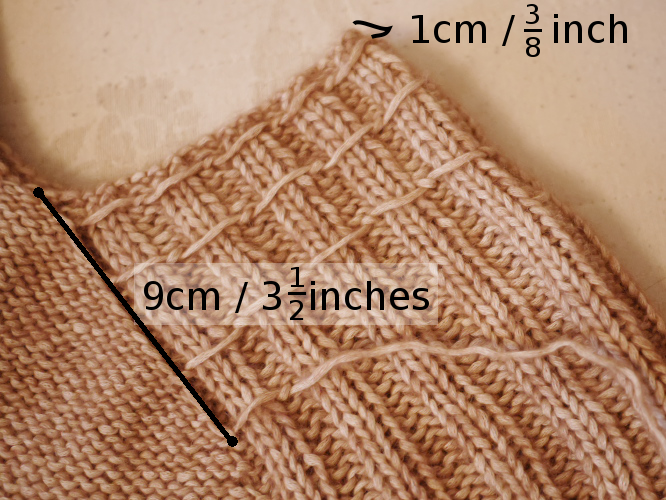
Basically you just have to add a few rows of running stitches along the shoulder area over the first 9 cm / 3.5 inches. You can work from 4 to 9 rows, depending on how close you want them to be. The more rows there are, the closer they need to be. In the example shown above, 4 rows are worked.
Work one shoulder at a time and start the first row from the center back approximately 1 cm / 3/8 inch from the neckline (so that it won’t show on the RS), making sure that you only catch the purl bumps on the WS of your work. These rows of running stitches have similar effect as the floats in fair isle projects. Make sure that you don’t pull the yarn too tight. Video tutorial here:
Enjoy this tutorial? Sign up for my mailing list for more knitting tips!

